Saturday, 26 July 2014

All The Little Things


I try to sew as often as possible, most often late at night once the kids are in bed. But I am better at sewing than I am at blogging. So this is a bit of a catch up for some of the things I've made over the past few months but not shared here. Sorry,but some of these are dodgy mobile phone photos.
 The first photo is from March. I made this Little Missy Bolero with some Lisette fabric for Eloise to wear with this GORGEOUS ribbon trimmed tutu I bought from a very clever, crafty friend and owner of CharliQ Tutus. It is so professionally made with lovely soft tulle and glossy ribbon. I can't recommend them highly enough.

Below is a pair of Leon shorts that I made into suspender shorts with a few small modifications. This reminds me I need to make some more Leon shorts. How cute are they?


I wanted to make a suspender skirt and started with the Pattern Emporium Flat Front Skirt. In the end I changed every piece except for the pocket lining piece. That is not because there is anything wrong with the pattern (in fact it's a great pattern for a simple skirt and makes a good jumping off point for individual creativity) but to get the look I was after I made the changes :)


The shorts above are Clover Shorts from Willow&Co paired with another Little Missy Bolero. I love both of these patterns. I will be making more of these when the weather warms back up.
The shorts below are another version of the Clover Shorts. These have the ruffle top which gives a paper bag shorts look.


Below is a little blanket I crocheted for Eloise's dolls bed. I made the squares for it a looooong time ago but finally stitched them all together.


One of the many Boo! twirly skirts I have made recently. This one has tiny strawberries on it and I bound the hem with contrast binding.


I made a modified Hummingbird dress from Rabbit Rabbit. It is a little shorter than the pattern (I was using stash fabric and didn't have enough for the suggested length) and the flutters are from the Boo! Designs DYO overalls pattern. I love the end result.


Below is the Louisa Dress from Compagnie-M. It is fully lined and the turquoise is corduroy so it is nice and warm. (and a little sneak peek at some buttons I made...more on that in a later post)


Thanks for visiting. Some exciting things are coming up....

I have been testing two fabulous patterns and can't wait to share some pics of them. I will be blogging about how to make your own buttons. Oh, and we are having a little giveaway on our facebook page to show our appreciation to you for following our little blog.

and... I forgot to mention... I passed all of my Fellowship exams!! No more exams for me for a really long time!

Please leave a message here or on our FB page to let me know what you think. Please feel free to link up pics of your projects too. I've enjoyed seeing some pics of Twirly Pettiskirts popping up :)

Kerry xx

Sunday, 13 July 2014

Twirly Pettiskirt Tutorial


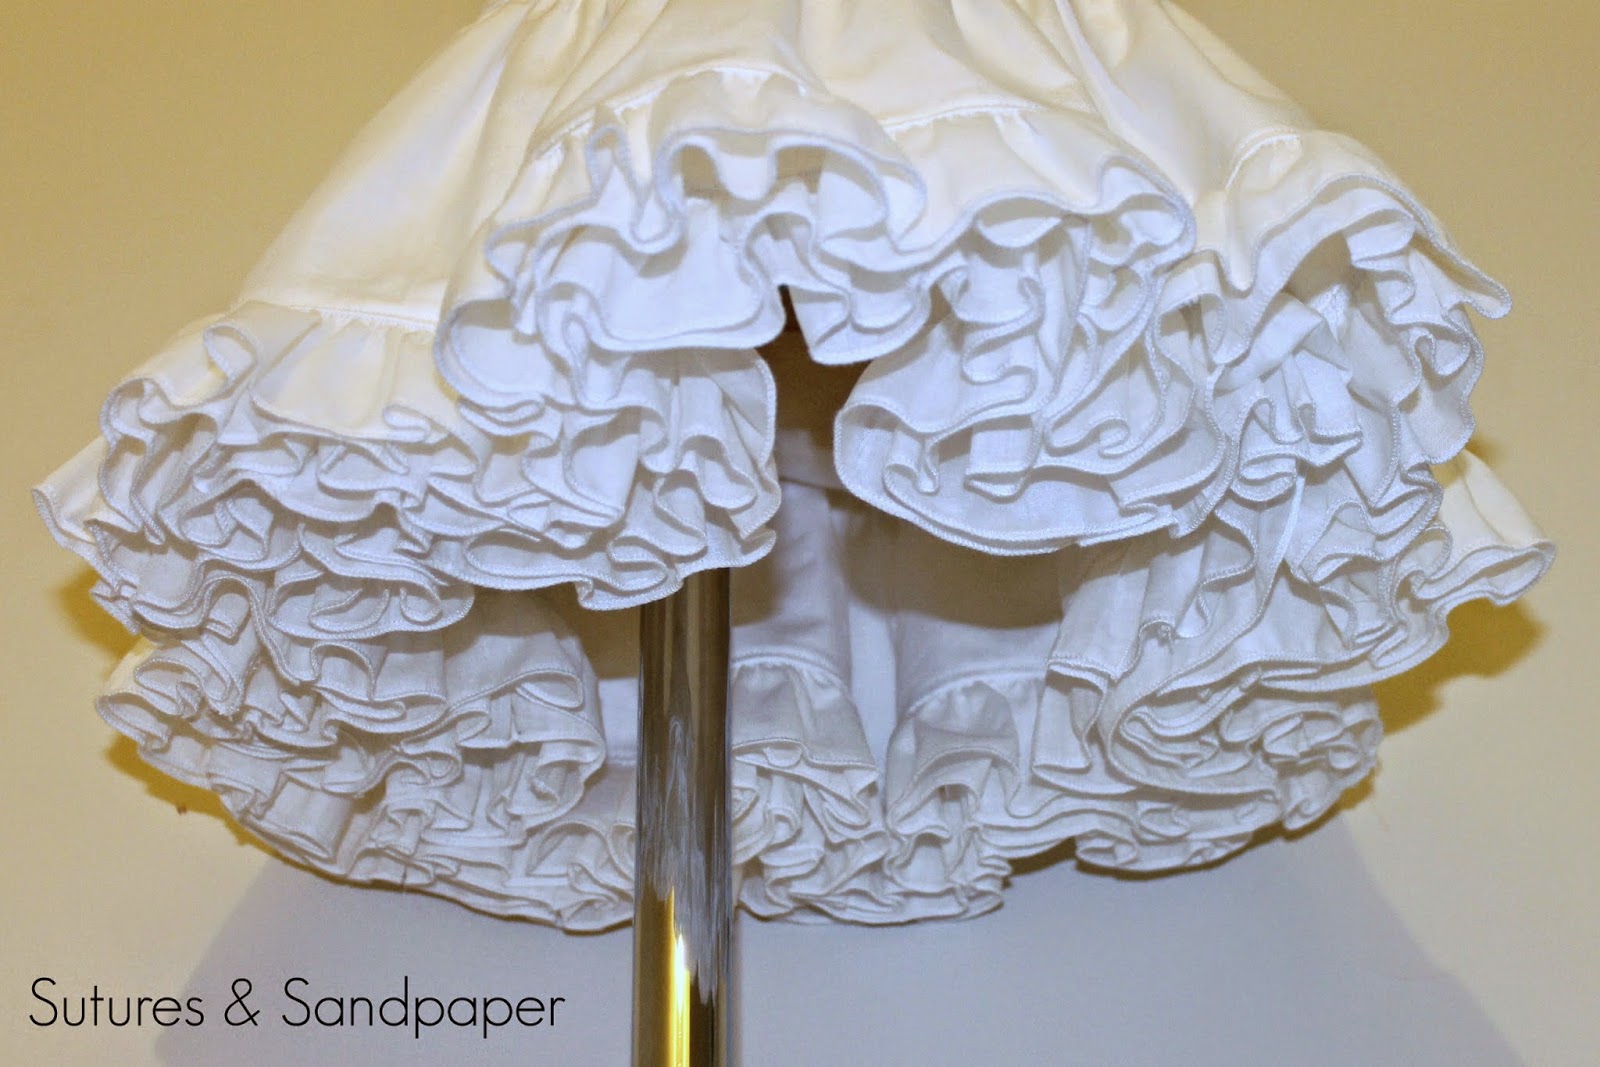
This is a super quick post to share an idea I had. I have been wanting a pettiskirt for E to wear when taking  photos of her dresses. The idea to use the Boo! DYO Twirly Skirt pattern as a jumping off point has been sitting in my mind for so long. Recently I decided to just do it.

So, this is a tutorial on how to modify the twirly skirt pattern to make a cute pettiskirt.  I love the Twirly Skirt pattern and have made so many of them for miss E.

I have a confession to make... I have, once or twice put two or three twirly skirts on E under a dress to give it the right amount of fullness... but now I don't have to :)


I suggest using a light fabric like lawn for this, though I'm sure it would work just as well with other fabrics. I used lawn for the bottom tier, but I was stash busting, so I didn't have enough. I used up some white quilting cotton for the upper two tiers.

I used the size 2 "Twirly Skirt With Contrast" measurements. I used the exact measurements for the waistband and skirt parts, but I cut two lots of the skirt part (ie four pieces). Then for the bottom ruffles I cut three pieces half the length of the contrast hem measurement and the full width of fabric (44" in my case). For larger sized skirts this will have to be wider, I would suggest at least double the width of the middle skirt so it gathers nicely.
The reason for it being half the length is because I didn't double it over. 

So:
Waistband Piece x2 (as per pattern)
Skirt piece x4 (two x the pattern)
extra long contrast pieces (four separate lots each about double the total width suggested but half the length)


So, now I had cut enough for one waist band, two skirts pieces and four extra wide contrast pieces. Then I sewed my bottom tier pieces together. I finished the bottoms of each of these with a rolled hem on my overlocker. Then (also using my overlocker) I gathered the top edges of each of them and pinned two to each of the skirt pieces' bottom edge and sewed them on. I made the middle skirt  piece as per the instructions (twice) and attached them to the waist band and finished the skirt as a normal twirly skirt. 

Here is a pic of a modified Hummingbird dress without, and then with the pettiskirt under it to show the difference it makes.


...and one more super ruffly pic because they look cool :)


For even more fullness you could add another middle skirt piece with two ruffle bottom pieces to it.

I have been working on some very cool pattern testing recently that I can't wait to share with you when the testing is complete. You will NOT want to miss it! 


In the meantime, I'll pop back with a post of all the little things I've made recently but not had time to write a post about.


Please let me know what you think :)


Kerry xx

---------------------------------------------------------------------

Little add on... I decided to make a pink pettiskirt using the same technique. The only difference is that I split the waistband part to use an extra colour. I used Lawn for all of this one and chose four shades of pink. I wanted it to get lighter as is went down and then darker again towards the inner layer.

And here are some photos :)


look at the coloured ruffles :) It turned out just like the picture in my head.


I just love how twirly skirts can lay out flat as a circle!


And... more ruffle shots. This bottom one makes me smile :)
It looks like a flower to me.


Thanks for visiting our blog.

Please feel free to leave a message or link to pics of your pettiskirts :)

Kerry xx


Saturday, 5 July 2014

Scalloped Princess Dress LKC Blog Tour and Givaway


What a fun blog tour. I've been so excited waiting to share my contribution. Lydia from Little Kiwi's Closet has designed this adorable dress pattern so every little girl can be a princess. Look at the line up on the tour :)


This pattern has loads of options. Four neckline options, two bodice options, three skirt length options and three hem styles!! By my calculations that's about 72 different dresses in one pattern. And it comes in sizes 12mo to 9yo. 

I asked Eloise which princess she wanted to be, and showed her lots of princess photos for inspiration. She was quite adamant "pink princess mummy". So pink princess is what she got. 


I opted for the scalloped skirt and the princess bodice and rounded neckline. I added in silver bias binding. I then drafted up the poufy parts for the sides... I know they probably have a fancy name but I can't think of it. 

To make the "poufy parts" I used silvery mesh fabric and cut two large circles (I traced around a pool ring). Then I folded them in half and gathered the curved edge with my overlocker. I then attached them between the skirt and the bodice outer before top stitching them in place. 

Eloise is wearing a pettiskirt I made under the dress which gives it a little more fullness. (I might post some pics of the pettiskirt in the next few days).


I love the look of the silver bias but unfortunately it is a bit scratchy, plus, it's winter and quite cold at the moment so we opted for a long sleeved white top underneath. 


I sent Mr Sutures to the shops to get a tiara and wand and I think he did a pretty good job. He even got little clip on earrings which completed the look. 


I didn't have to ask E twice to get all dressed up in this outfit. 


I found this pattern easy to follow and the end result was exactly what I hoped it would be. I think the beauty of this pattern is the many, many options. You can make a fairy tale princess dress with it, but also a regular, wear everyday dress. You can grab your copy of the pattern here. And, don't forget to go to Little Kiwi's Closet to check out the other great dresses on the tour.

Please enter the giveaway below for your chance to win.

Feel free to leave a message to let me know what you think :)

Kerry xx

a Rafflecopter giveaway

Wednesday, 11 June 2014

Mimi Blog Tour


I was over the moon when Mélanie from Filles à Maman contacted me to be a part of her Mimi pattern tour. I had watched during the testing phase as her testers came up with so many different looks. And, now I am enjoying seeing all the great Mimi Tops and dresses so far on the tour and looking forward to seeing many more. Look at the great line up of talented seamstresses! 


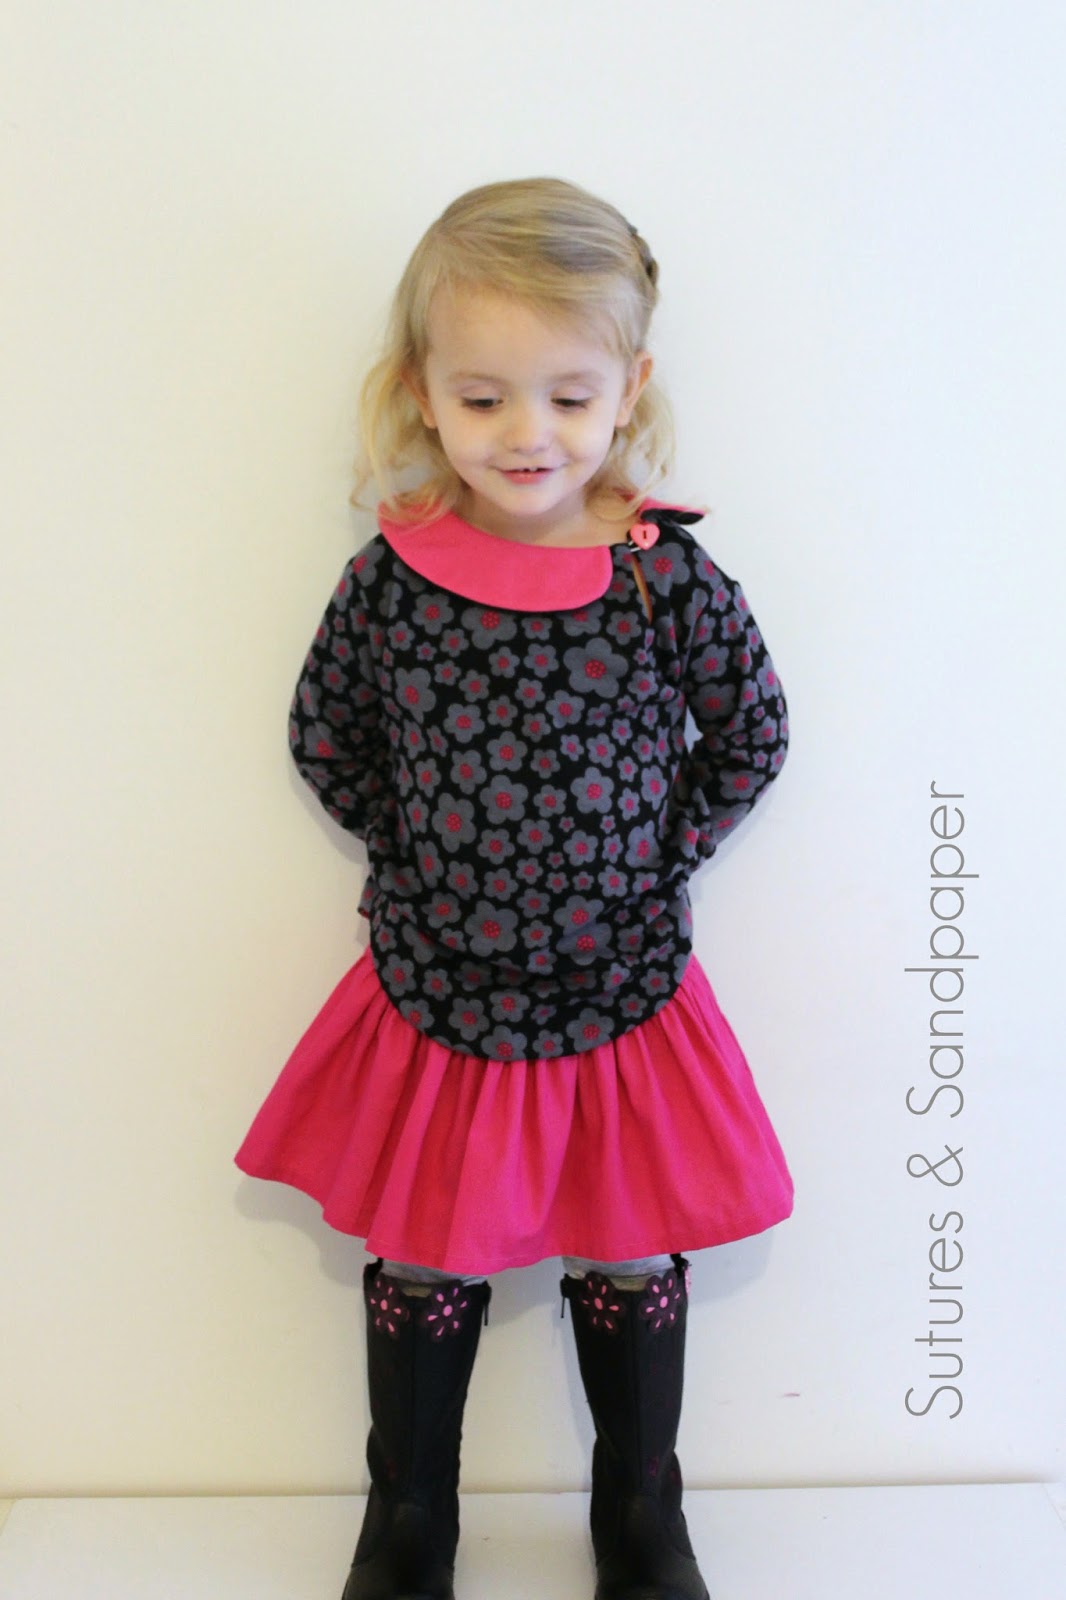
 It took me a long time to decide which of the pattern's options I wanted to use. In the end I decided to go with the top version and the asymmetrical collar and long sleeves. We have just entered winter here but it is not really very cold yet. I envisioned a garment that could be layered as it gets cooler. 

Look at the asymmetrical collar and keyhole neckline. I used a jersey knit as the main fabric then for the top of the collar and facings I used pink jersey and the underside of the collar is black jersey. I added a hot pink button as the keyhole closure.  By using the pink for the facings I got little glimpses of pink when she wore it. 


I made the top in size 2 and it fit beautifully. The top is a bit longer than a regular T-shirt so it will work nicely with leggings and there are instructions on how to lengthen or shorten it to your liking. I made the standard top length but wanted it a little shorter to sit well with the twirly skirt I made. So I decided to add ruching to the sides. 

The pic below shows how I went about that. I cut a short length of 1/4" elastic and lined it up with the side seam just above the facing. Then I did a little zigzag to hold it in place. I then lengthened my zigzag stitch and sewed along the elastic while stretching it out. I then applied a little steam from my iron and it ruched up nicely. 


I made a Boo! Designs Twirly skirt in solid pink and paired it with grey leggings and black boots. We went shopping for boots just for this outfit but I suspect they'll get a lot of wear this winter, she loves them. I think it could easily be paired with leggings alone, or a pair of skinny jeans. 


Look at that sweet innocent face! Don't be fooled, I found a lot of shots with VERY cheeky faces being pulled :)


Eloise insisted we get some sitting down photos too. 


I can't get over the shot below. She is such a natural at posing for photos. 


I just love this pattern. It is quick and easy to make, comfortable to wear and very trendy. I also love that it is so different to other patterns and to store bought tops. The pattern is well drafted and the instructions are easy to follow. There are lots of options to choose from too. Please pop over to Filles à Maman and check out all the other bloggers in the tour. 

You can buy the pattern here. I recommend it for beginner and advanced seamstresses alike. To make it even better there is a discount code: MIMITOUR20 for 20% off. Oh, and enter below and you could win 5 Filles à Maman patterns of your choice!!! 

As always, I'd love to hear what you think, so please feel free to leave a comment or question :)

Kerry xx


a Rafflecopter giveaway

Friday, 25 April 2014

The Caroline Party Dress - from MHC


There was a sale at my local fabric store recently and I spotted these pretty fabrics. While I was in the queue to get the fabric cut the lady behind me asked what I would be making with these two fabrics. I said a dress for my daughter. The lady, an older lady, did not look impressed by that idea. I guess they are not traditionally "girly" fabrics. 

I decided to make a Caroline Party Dress (from Mouse House Creations). It is my second one (so far). This pattern is awesome. Not just because it leads to a pretty dress. This dress is pretty inside and out. It is fully lined and has an invisible zip. It has no raw seams on the inside so I imagine it is very comfortable to wear. The cut is so sweet for little girls and I LOVE the capped sleeve. There is also the option for a peter pan collar. 

This was the first one I made - for a Rainbow themed project:

Hayley has good instructions for inserting the invisible zip but I must say I still had a couple of "Grrr" moments. Mainly because I tried to do it too quickly. There is also a ladies Caroline pattern (which has been sitting in my etsy cart for the longest time) and I am very tempted to buy more of this fabric to make matching mummy/daughter dresses...too creepy??  


Not too sure what happened with my photo lighting but I promise Eloise hasn't got deeply, deeply tanned legs...

So what do you think? Was the lady in the fabric store right or can my Eloise pull off this look? 
I'm pretty happy with it to be honest. 

Oh, and quick update... I got my results back for my first two exams and... I PASSED!! YAY! One more exam to sit and then I'm free :)  Hopefully I'll be a better blogger when I have more free time. I'm hoping to make some more of the Willow & Co patterns next...first up Clover Shorts!

Monday, 14 April 2014

I Heart Pattern Testing: Fawn Lily from Willow and Co.


Is everyone else as excited as I am about the upcoming release of  Willow and Co.'s first collection, Wanderlust a Glamping Collection? Some of my favourite bloggers and pattern designers have come together to make an awesome spring/summer collection of patterns. 

I was lucky enough to test the Fawn Lily dress. This pattern was designed by Rebecca from Rock the Stitch. It is her first official pattern and wow did she hit the ground running! It is a unique pattern that looks wonderfully different to other little girl's PDFs. It is a well written pattern with clear, easy to follow instructions, professionally drafted pattern pieces and options (I love options). This pattern has the option of two different sleeve styles, button up or crossover bodice, it can be a tunic or a dress and there are different dress length options as well as the option of a-line, gathered and pleated skirt!!.  


One fun thing during the testing process was seeing how the use of different fabrics made for very different looks. It looks great in anything from one to four different fabrics. For my first version I used two coordinating fabrics. I chose the non-pleated sleeves and the crossover bodice with piping and the pleated skirt at knee length.


I love the fit of this dress on Eloise. It is light and flowy and fits her perfectly.


And a couple more...


I may be biased but this little girl is irresistible! 


I recommend this pattern. It has lots of great options and is easy to sew with clear instructions and a fabulous end result. I will be checking out the rest of the collection when it is released in about a week at Willow & Co.

Please feel free to leave a comment to let me know what you think :)

Kerry xx